Create listing schedule by uploading Excel
About This Feature:
Excel upload scheduling is a flexible way to set scheduled listings. By uploading an Excel file, you can set different listing times for multiple profiles at once and add these scheduled tasks to the Scheduled Listing Queue in bulk. For other scheduling methods, please refer to “Setting Up Scheduled Listing”
Notes:
- Do not change the Excel template’s column names or order, and do not add new columns; otherwise, the upload will fail.
- The time entered in Excel must use the site’s time zone, and the format must match the system’s time format settings.
How It Works:
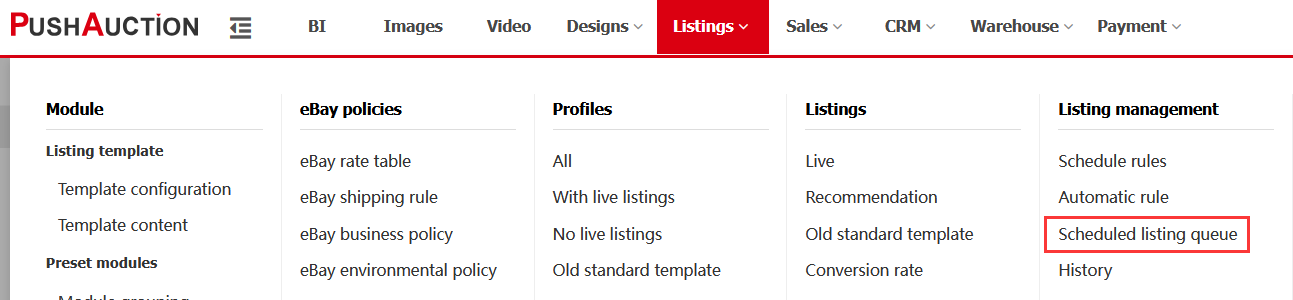
Step 1: Go to the upload section in the Scheduled Listing Queue
Listings > Listing Management > Scheduled Listing Queue. On the Scheduled listing queue page, click the [Upload] button on the right.
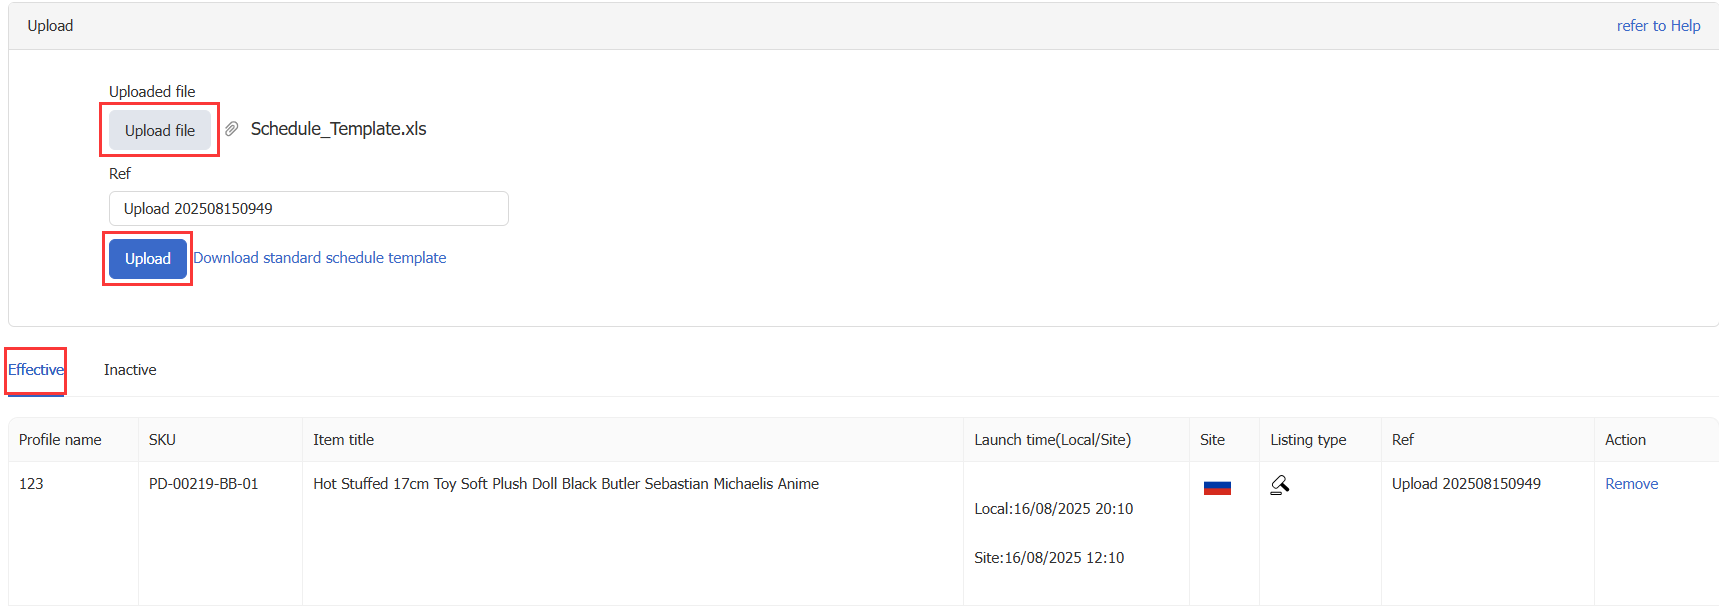
Step 2: Download the standard template
Click [Download standard schedule template] and save the Excel file locally. The document contains two columns:
- ProfileName: Enter the exact name of the profile to be scheduled.
- Launch time (Site): Enter the scheduled listing time (must be in the site’s time zone).

Note: Do not change the Excel template’s column names or order, and do not add new columns; otherwise, the upload will fail.

Step 3: Fill in the Excel template
In the local Excel file, fill in the profile name and scheduled listing time as required. Ensure the time format is correct and at least 15 minutes later than the current time.
Note 1: The time in Excel must be in the site’s time zone and must be at least 15 minutes in the future.
Note 2: The time format must match the system’s settings. You can check it at “Setting > System Setting > Preferences > Time format”. For example, if the format is dd/MM/yyyy, then Excel must use 16/08/2025 12:10.

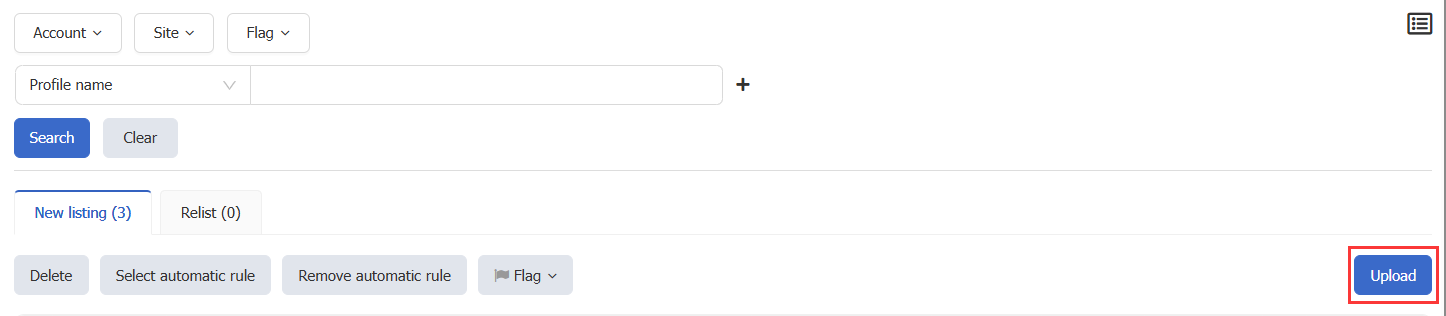
Step 4: Upload the file
On the upload page, select your edited Excel file and click [Upload]. Once the upload is complete, the system will display the validation results below:
- Effective: The task can be added to the Scheduled Queue.
- Inactive: The task cannot be created, and an error message will be shown.

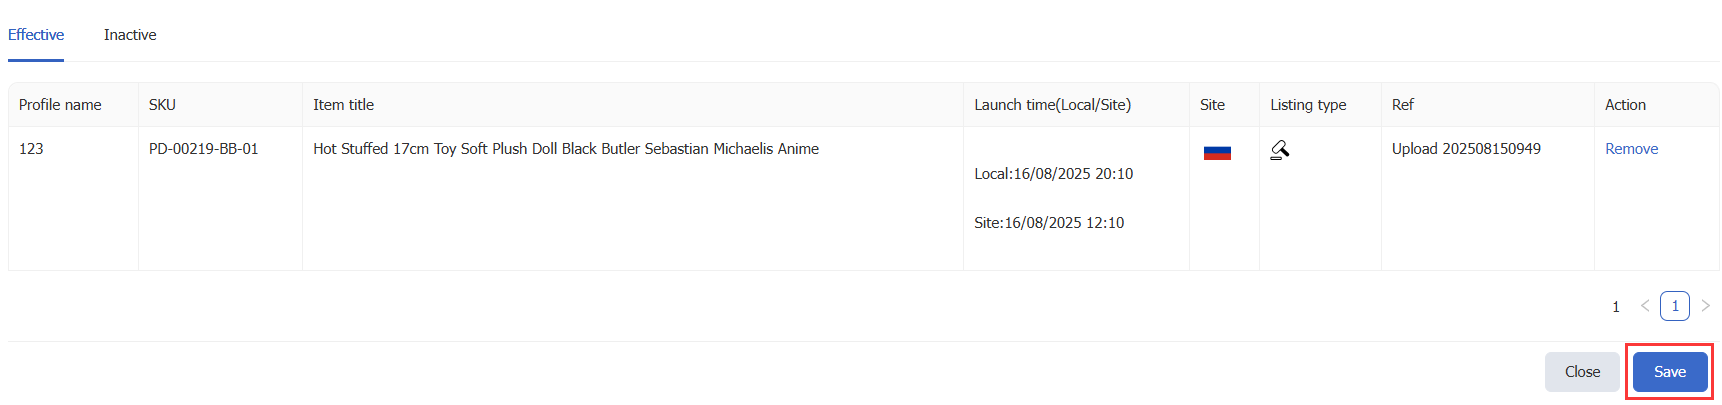
Step 5: Confirm Upload
Click [Save]; effective tasks will be added to the Scheduled Listing Queue immediately.
After completion, go to the Scheduled listing queue page, select the corresponding date, and click the refresh button on the left to verify whether the tasks were successfully added and times are correct.
Article Number: 1951
Author: Tue, Aug 12, 2025
Last Updated: Fri, Sep 5, 2025
Online URL: https://kb.pushauction.com/article.php?id=1951