Set up listing schedules
About This Feature:
To improve listing efficiency and better arrange listing times, our system provides multiple scheduled listing features. This article details three methods for setting up schedules and how to view the scheduled queue. To delete a schedule rule, please refer to "Deleting Scheduled Rule" .
Notes:
- We recommend setting separate schedules for auction and fixed-price profiles to avoid confusion.
- Profiles must first pass the “Check eBay Fees” process; otherwise, they will not appear when creating a schedule rule.
- When creating a schedule, you can also set “Auto Rules” — see more about Auto Restock and Auto Relist .
- The scheduled start time for a profile must be at least 15 minutes later than the current time (site time zone).
Part I. Three Ways to Set a Schedule
Method 1: Schedule a Single Profile
Suitable for scheduling individual profiles.
Step 1: Open the scheduling page
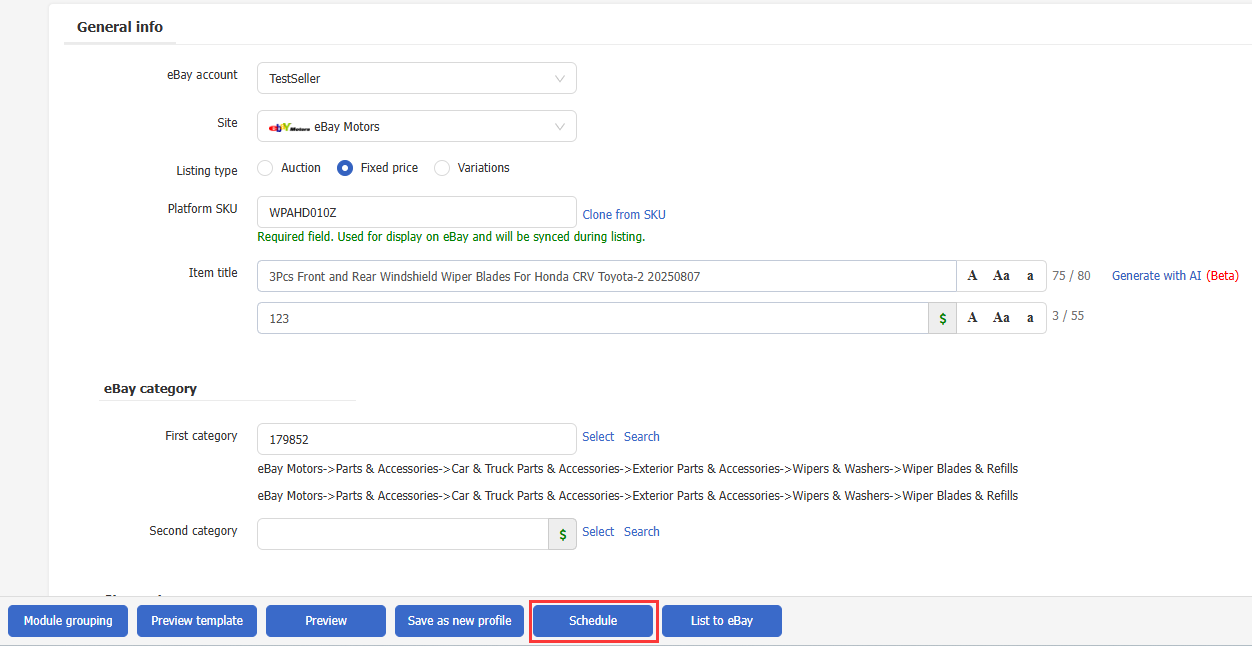
Open a specific profile edit page, click the [Schedule] button at the bottom
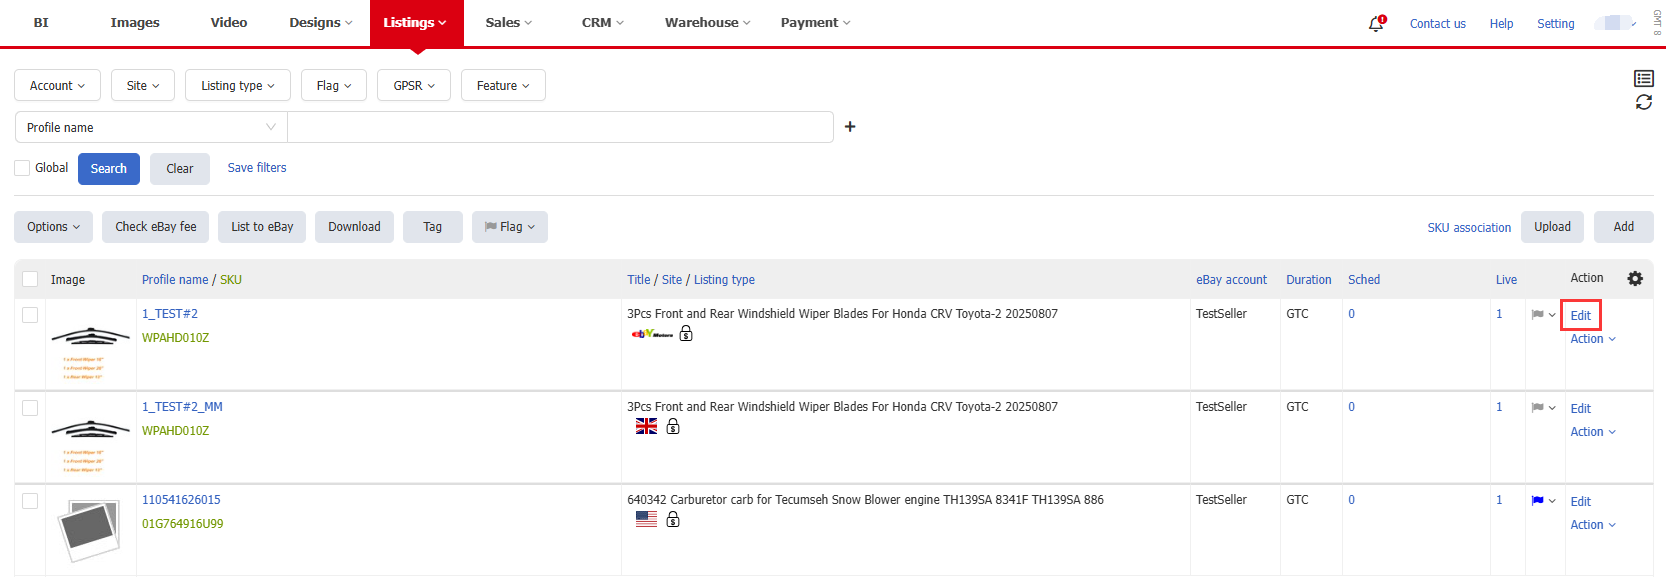
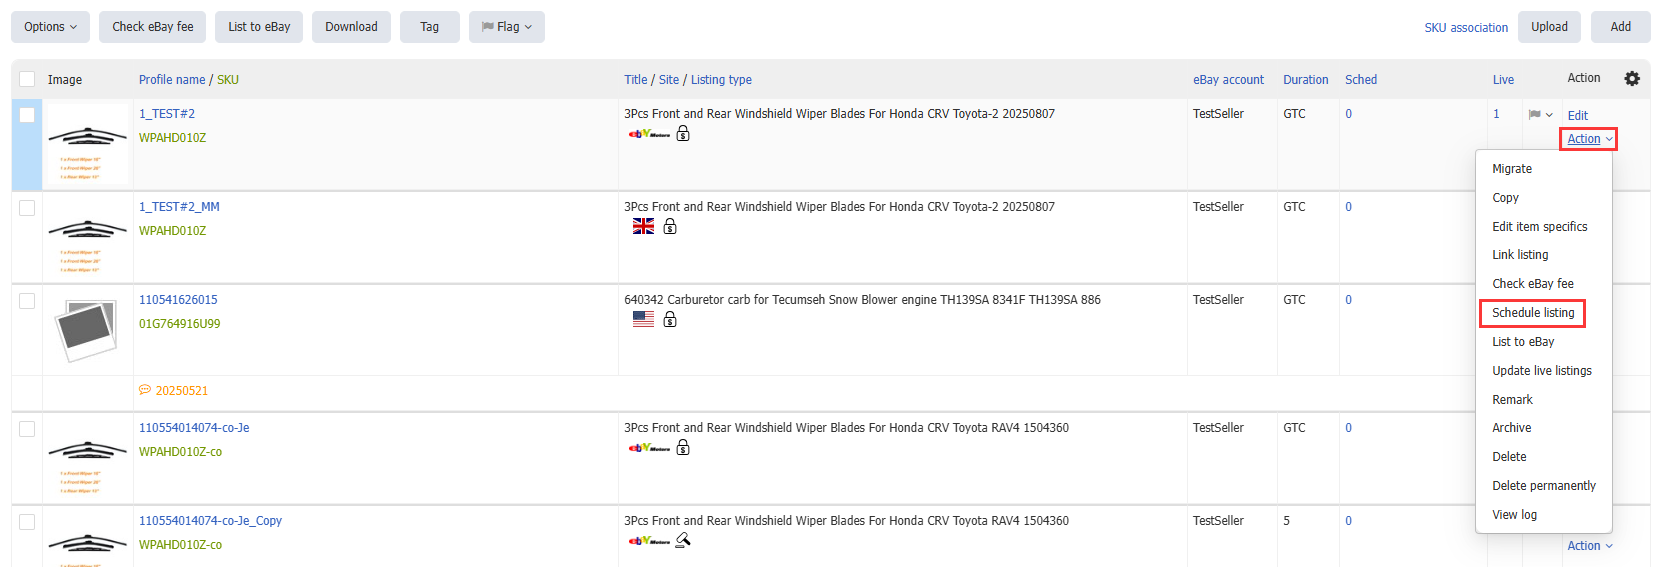
or in the profile main page, click [Schedule Listing] under “Actions”.
Step 2: On the scheduling page, choose one of the following methods:
Option 1: Click [Add] to set a one-time scheduled listing
1. In the “launch Time (Site)” field, select a specific date and time.
Tip: Auto rules can also be added here.
Tip: Auto rules can also be added here.
2. Click [Save] to add a scheduled task
3. Repeat to add multiple scheduling tasks if needed
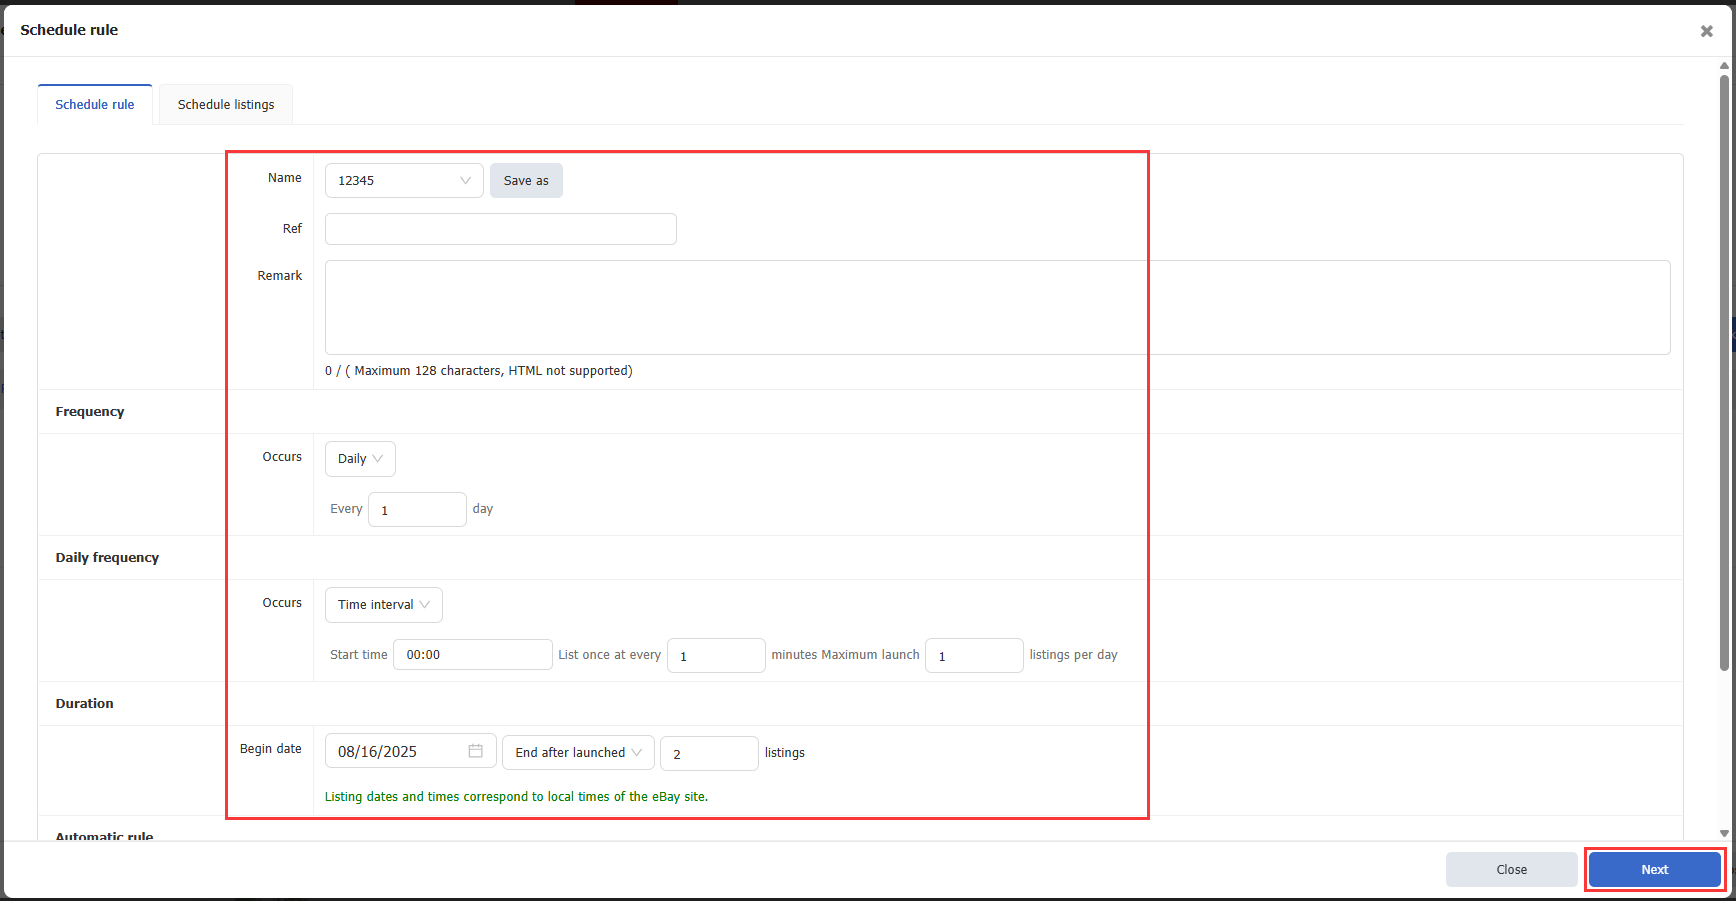
Option 2: Click [Bulk Add] to set recurring schedule rules
1. Go to the “Schedule Rules” page and configure the rules (daily frequency, start time, frequency, total listings, duration, etc.)
Tip: Existing rules can be loaded by name, or save the current setup as a new rule.
Tip: Existing rules can be loaded by name, or save the current setup as a new rule.
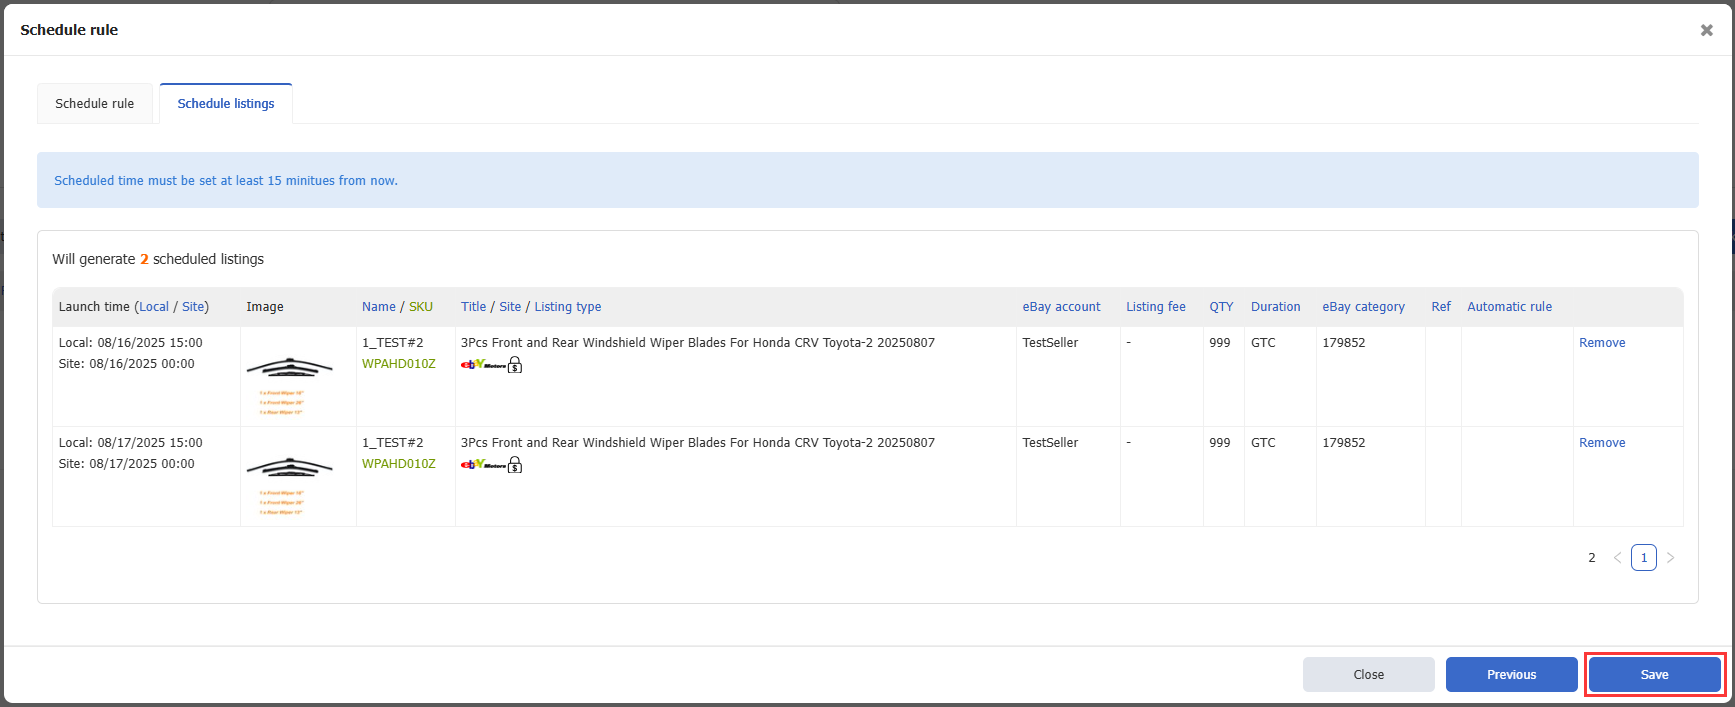
2. Click [Next] to go to the “Scheduling listing” tab
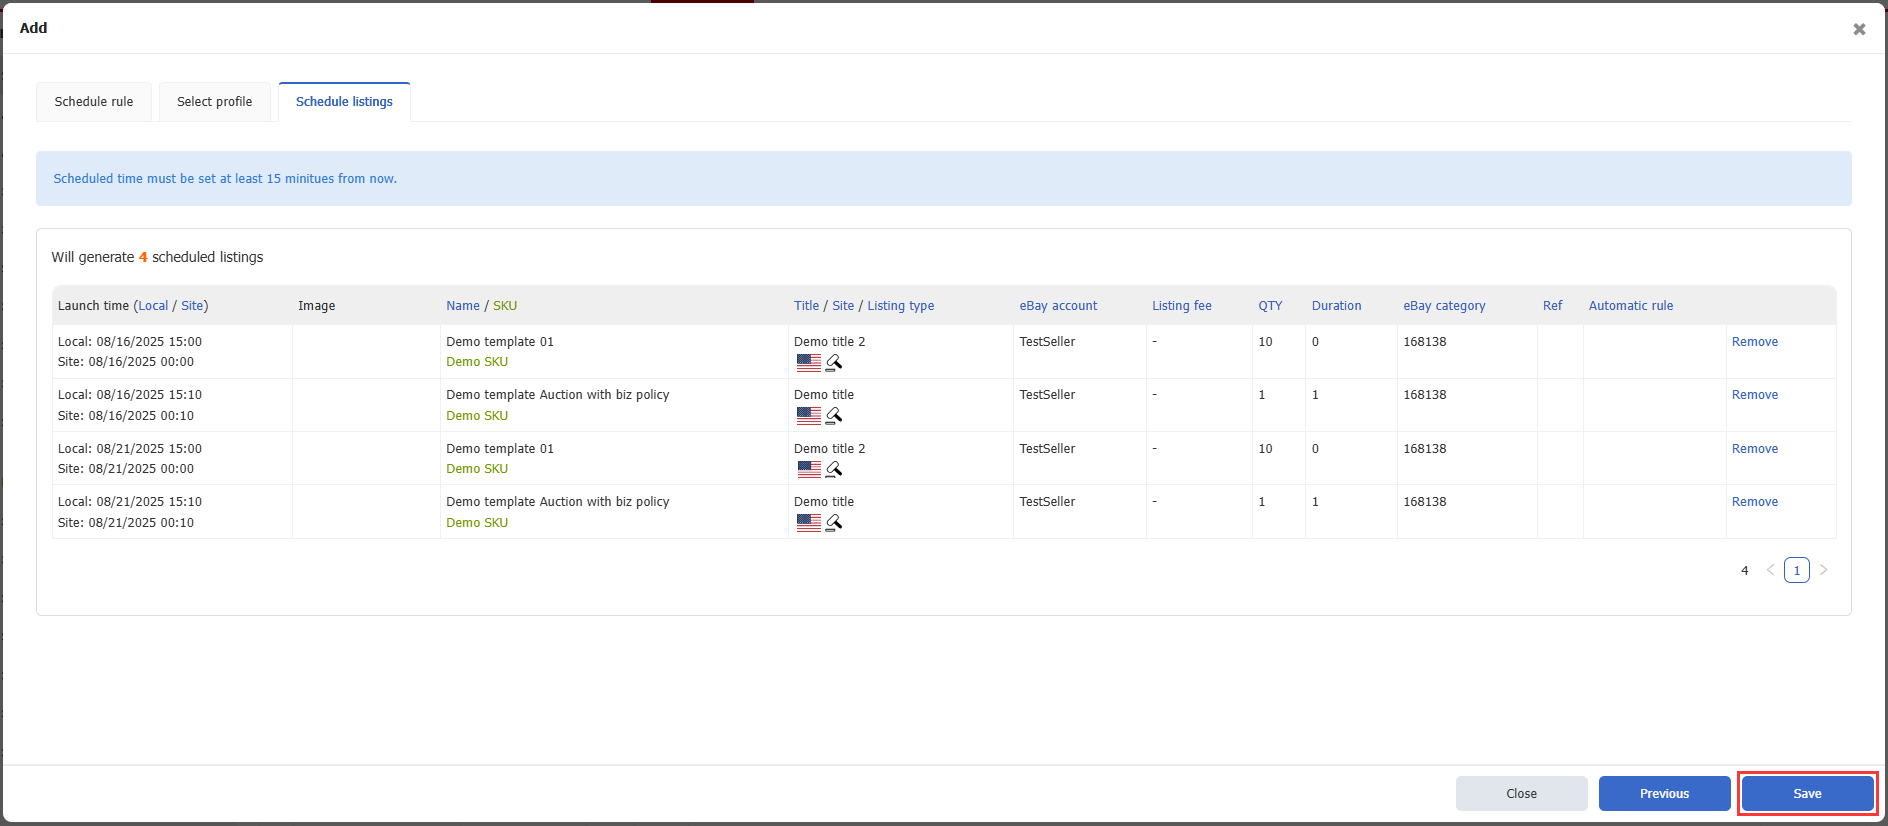
4. Verify the scheduled launch time, then click [Save]
Method 2: Set Recurring Schedule for Multiple Profiles
Suitable for applying the same schedule rule to multiple profiles.
Step 1: Open the Schedule Rules Management page
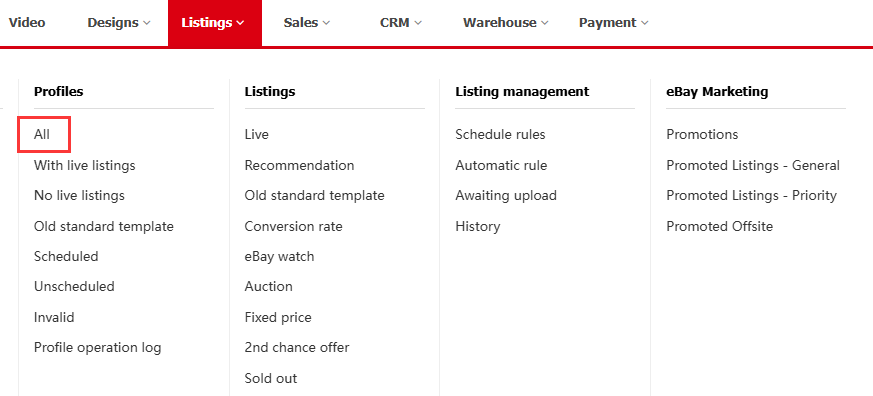
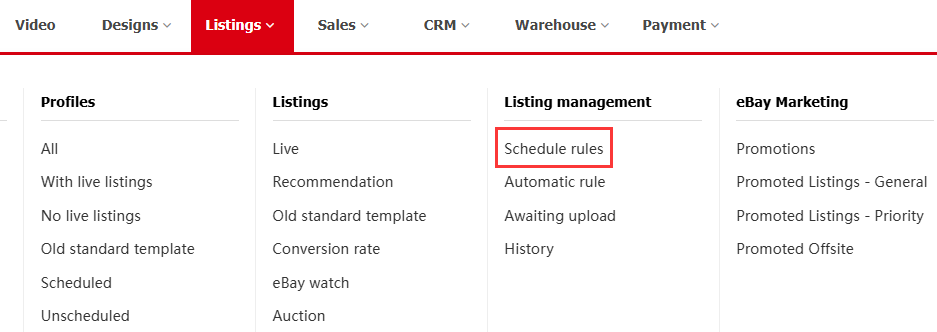
Go to Listing > Listing Management > Schedule Rules, then click [Add]
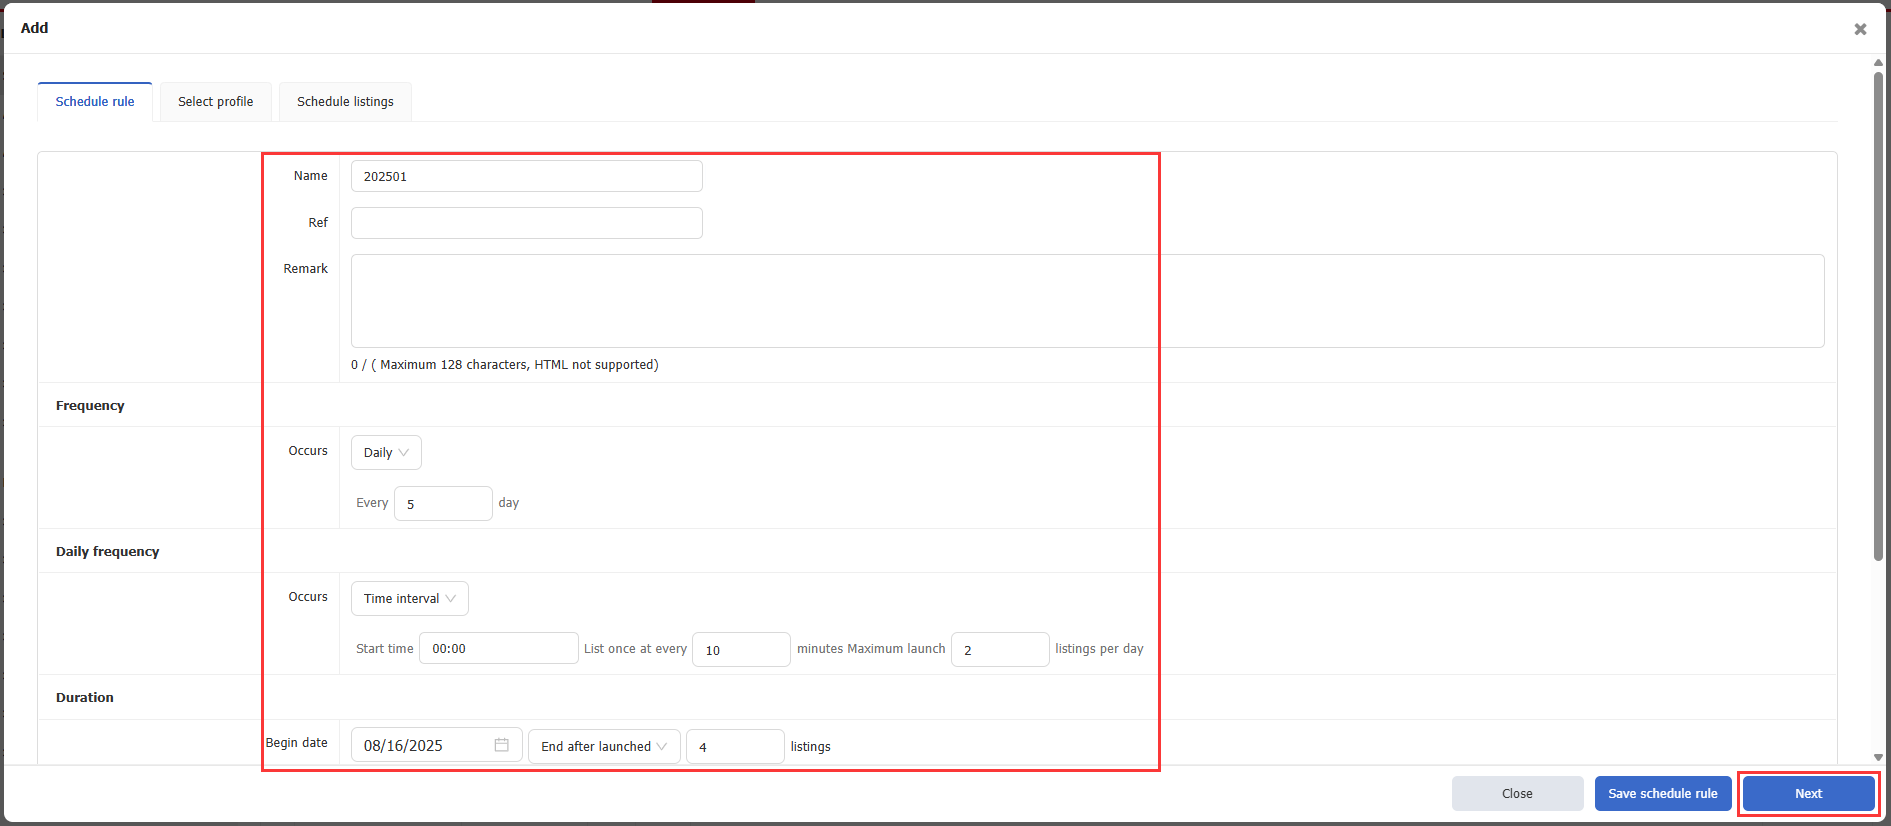
Step 2: Configure the recurring schedule rule
Same as “Batch Add” in Method 1. Once done, click [Next]
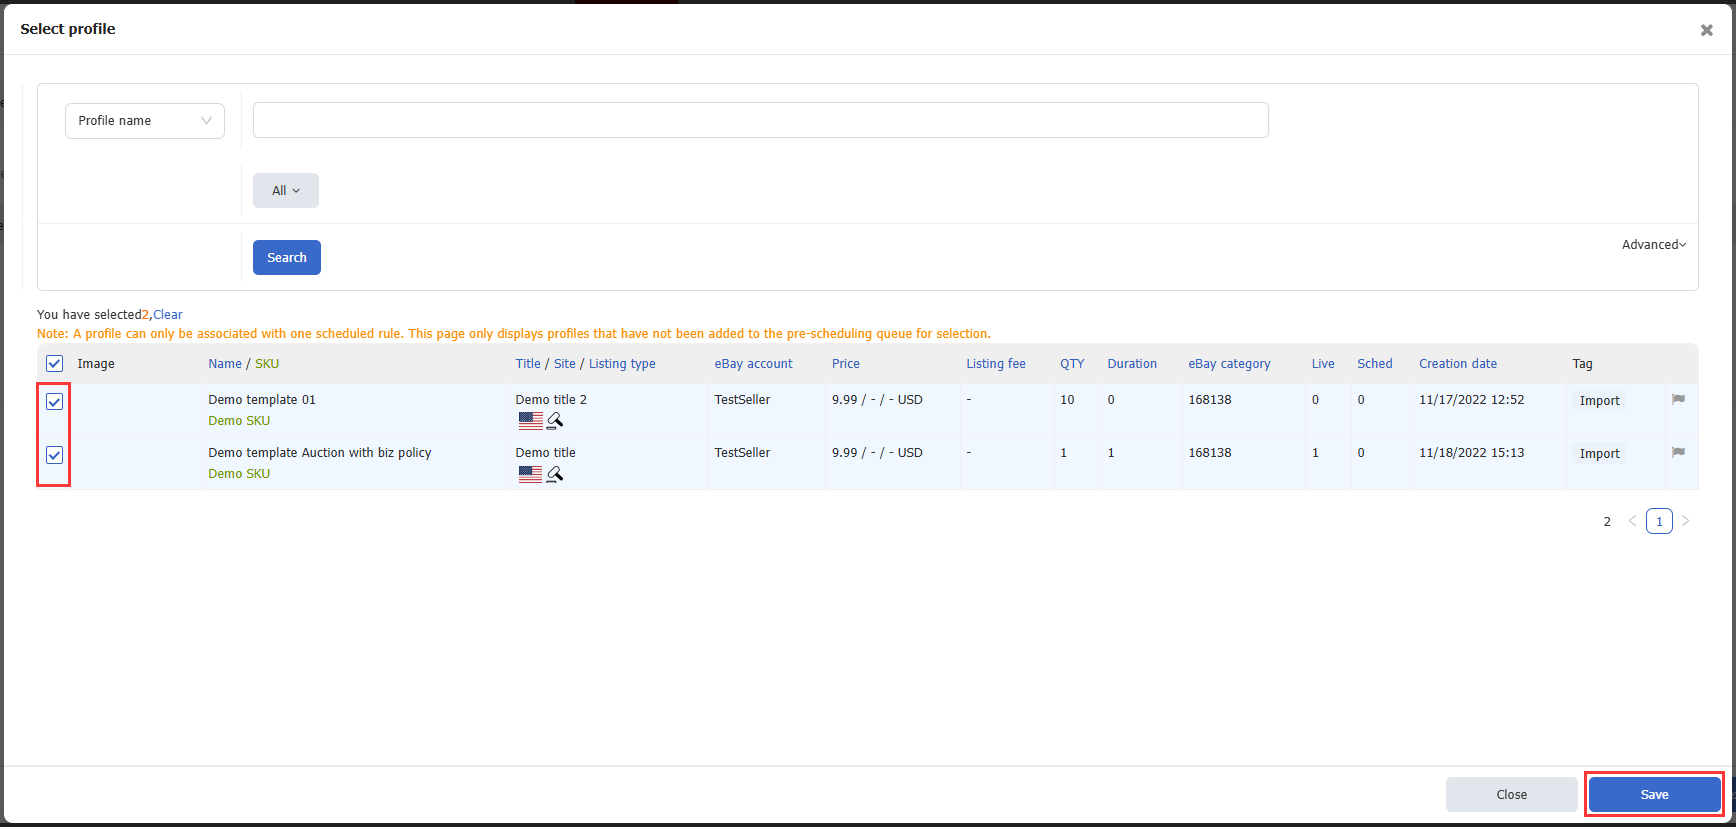
Step 3: Select Profiles
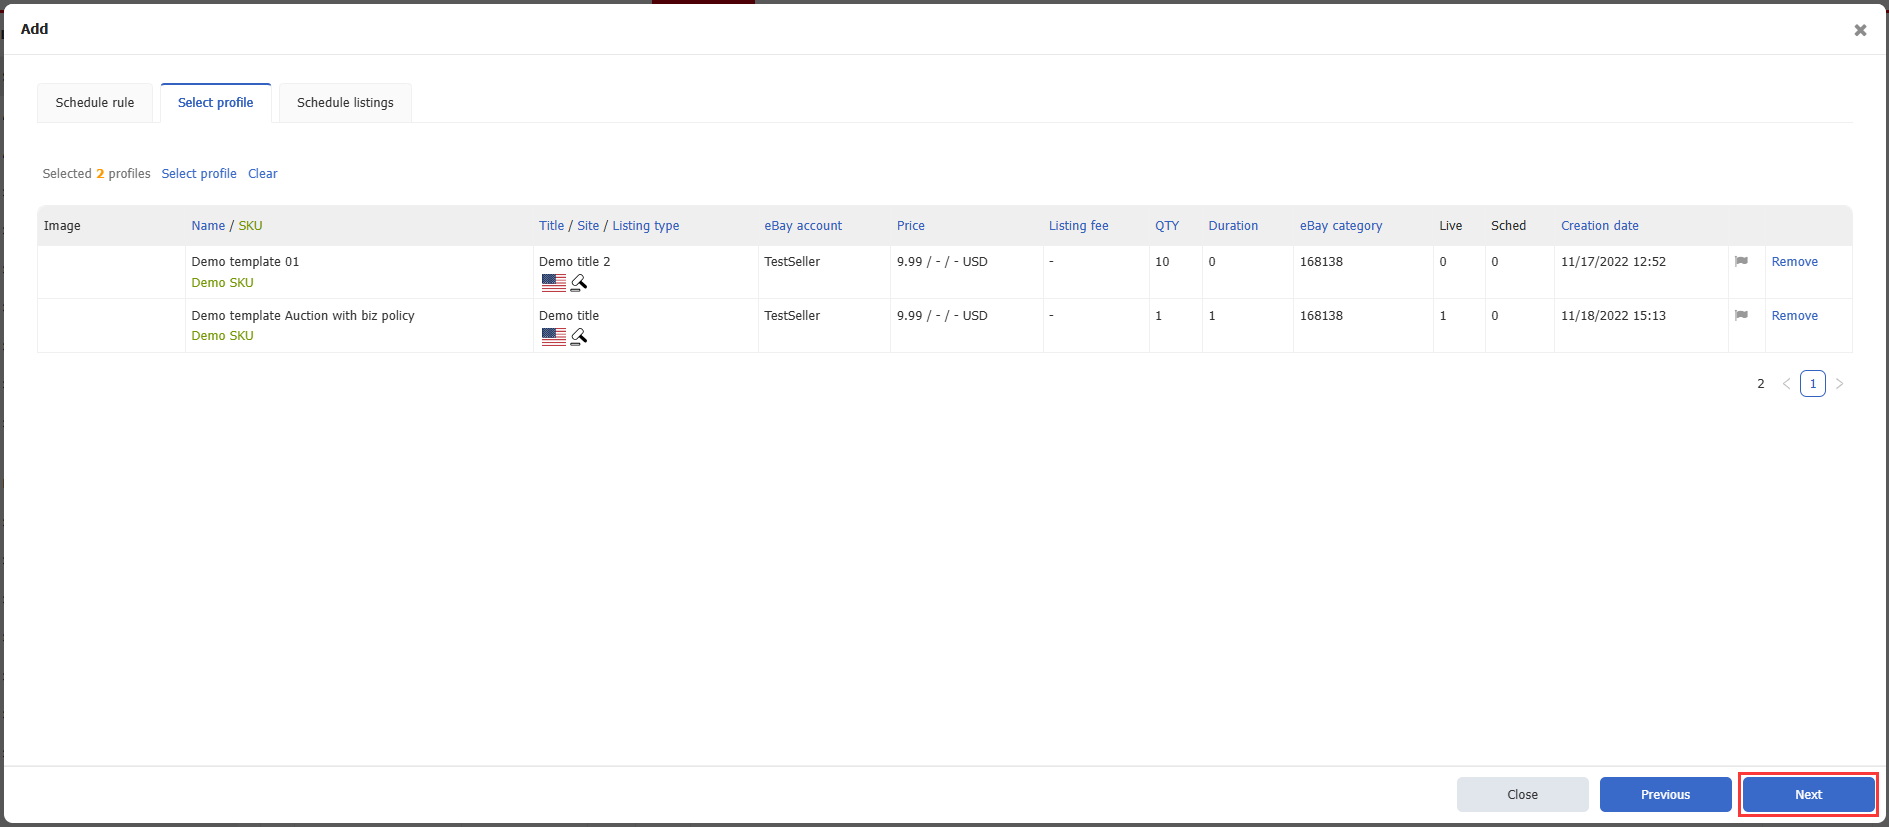
Choose multiple profiles to add to the schedule, then click [Next]
Tip: Before adding profiles, run “Check eBay Fees” to ensure compliance, avoiding failed scheduled listings.
Step 4: Generate Queue
Click [Next] to go to the third tab "Scheduled listing". The system will generate the queue. Review and click [Save]
※ To delete a schedule rule, first clear all scheduled listings and profiles via “Delete Schedule” and “Remove Selected Profiles” before deletion.
Method 3: Schedule Relist for Ended Listings
Suitable for relisting ended listings at a future time.
Step 1: Open the Relist page
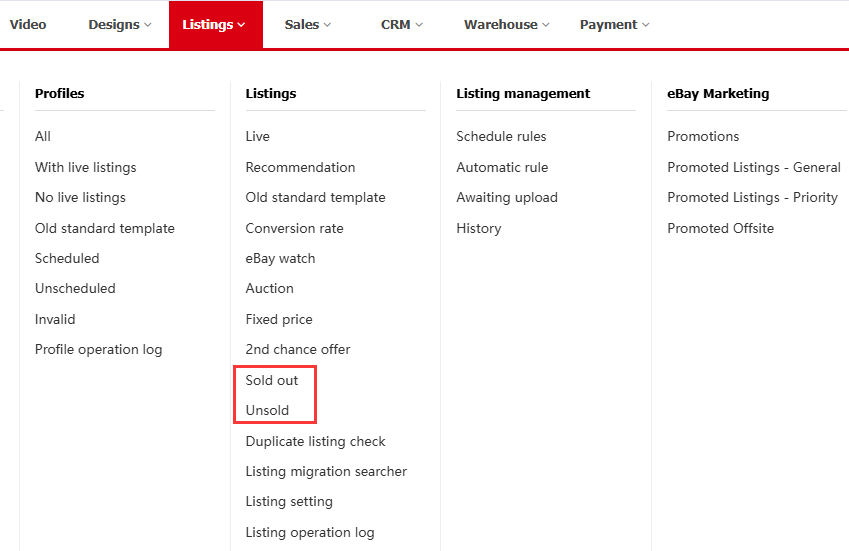
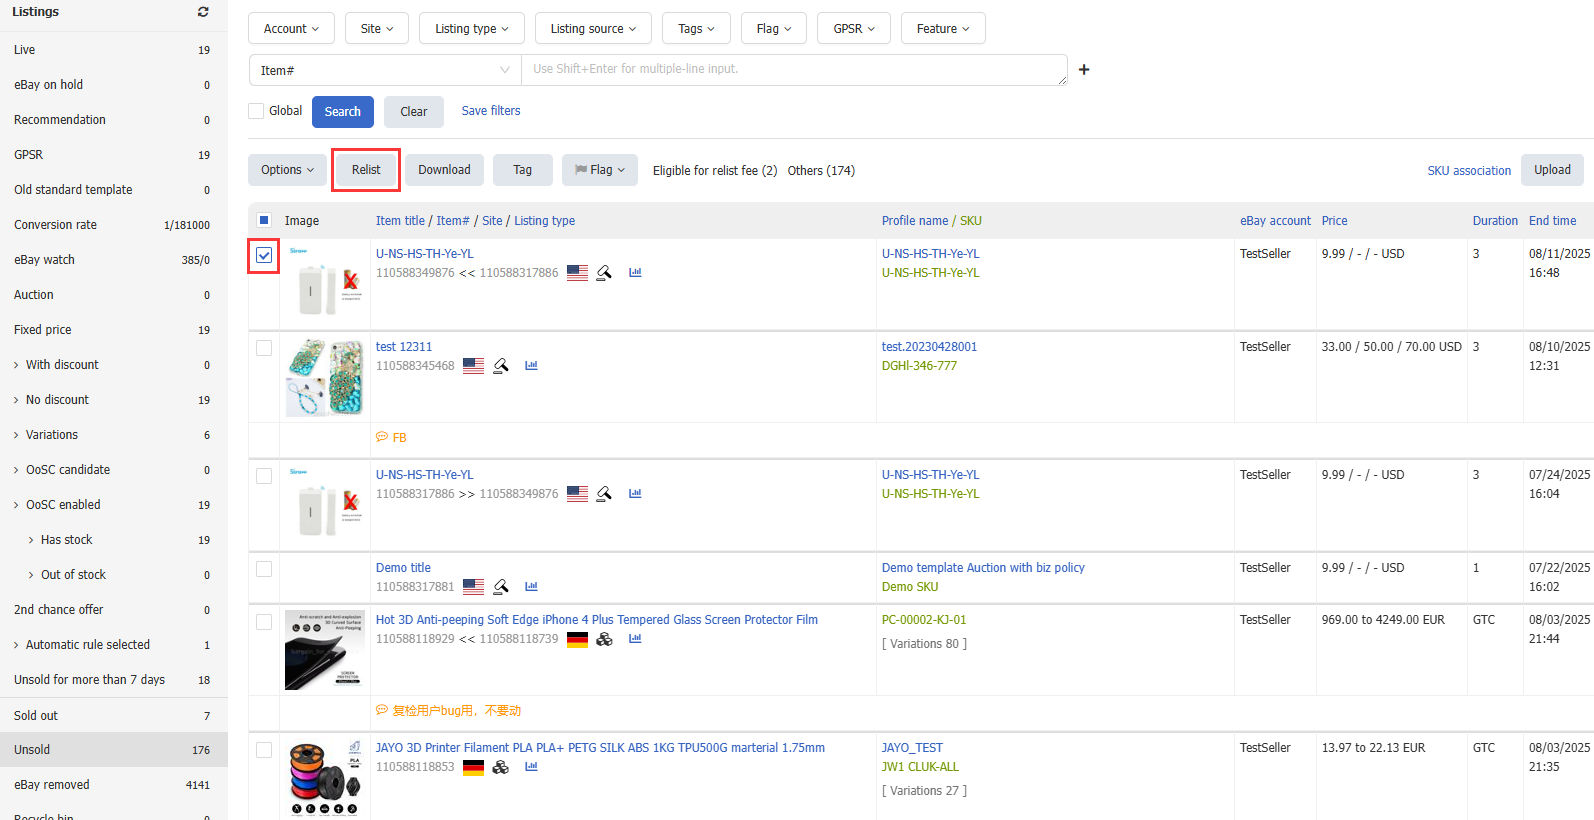
Go to Listing > Sold out/Unsold, select multiple listings, click [Relist]
Step 2: Set the schedule time
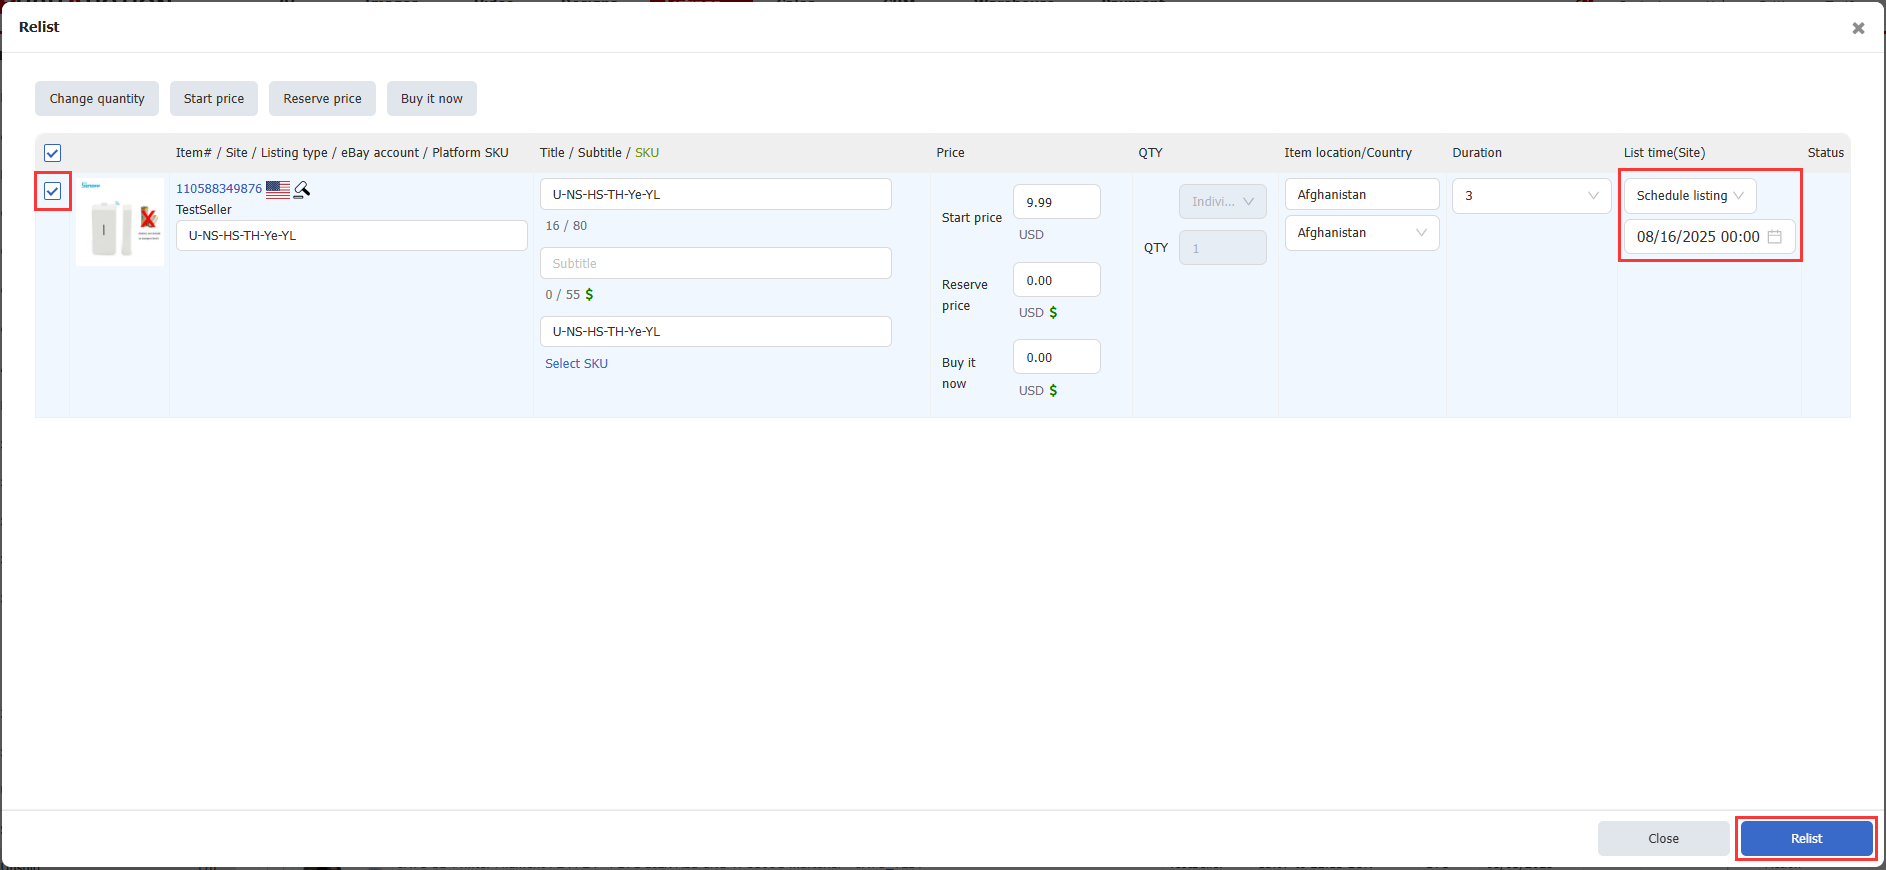
In the popup, under "List time (Site)" column, select [Schedule Listing], set the target time, then click [Relist]
Part II. How to View the Scheduled Queue
All scheduled tasks — one-time or recurring — can be viewed and managed via:
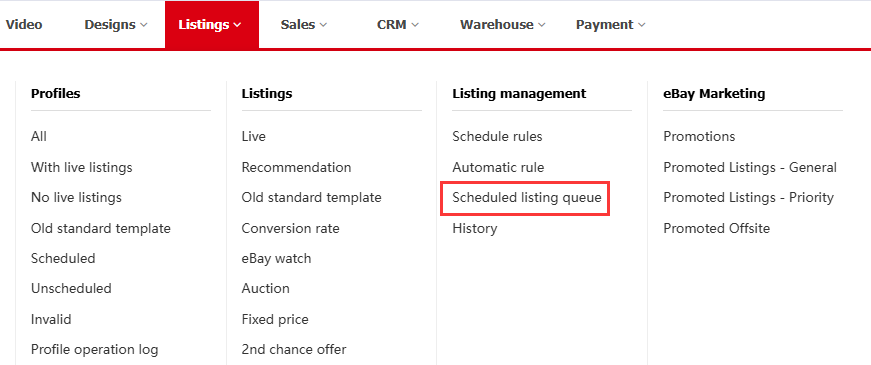
Path: Listing > Listing Management > Scheduled Listing Queue
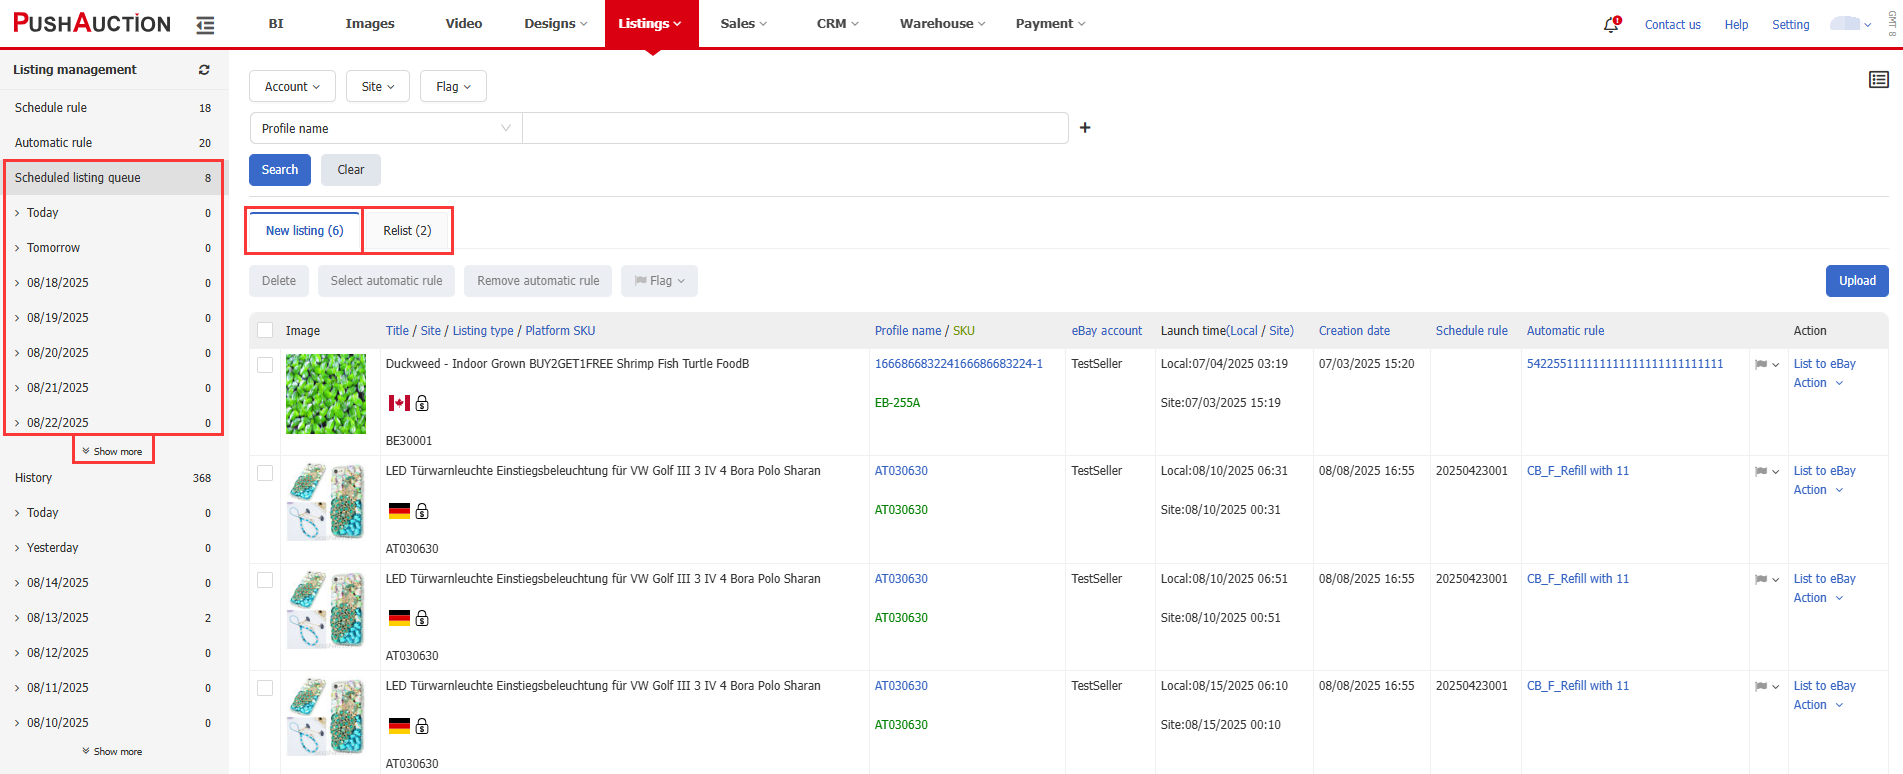
- Left Date Panel: Shows today, tomorrow, and the next 15 days. Click a date to view tasks
- [New Listing] tab: Shows schedules created from profiles or rules
[Relist] tab: Shows schedules for relisting “ended listings”
Article Number: 566
Author: Mon, May 23, 2016
Last Updated: Fri, Aug 15, 2025
Online URL: https://kb.pushauction.com/article.php?id=566
