How to Use Tags for Categorization, Filtering, and Bulk Actions
Definition: The tag function allow you to organize your profiles and listings with flexible custom labels. This helps to quickly categorize, filter and batch edit more efficiently. Tags applied to listings can also be used for cross promotions-see cross promotion section for more details.
This article uses the Profile page as an example. The same features and operations are fully supported on the Listing page.
Notes:
- Tag functionality and operations are identical on both the Profile and Listing pages.
- The is no limit to the number of tags - you can define them freely to match your needs.
- Supports batch operations, ideal for managing a large number of items.
Step 1: Set up your tags
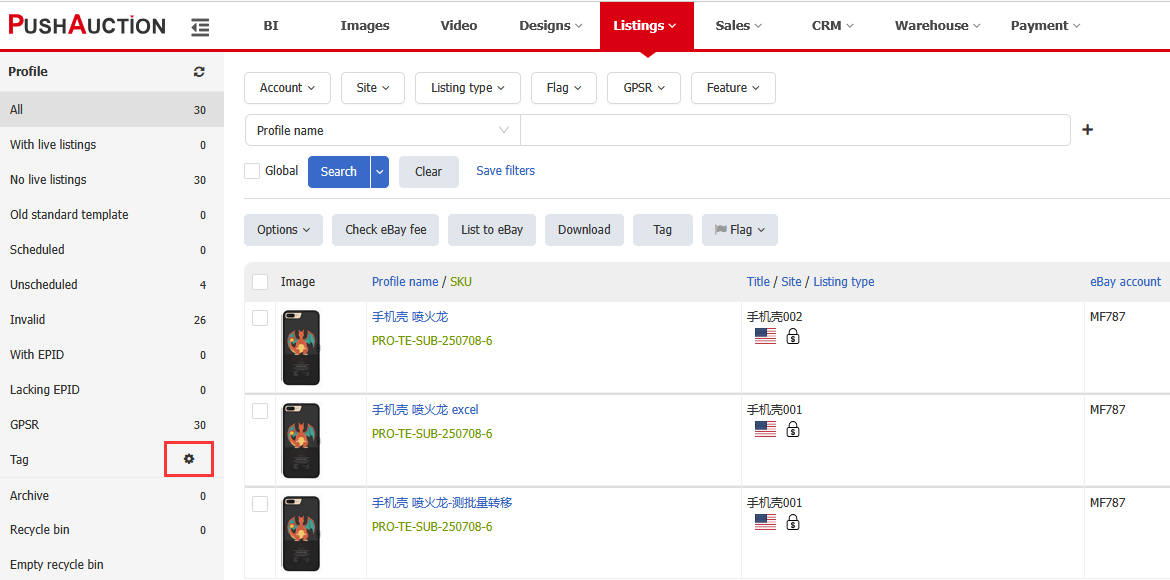
- In the left-hand menu, go to the "Tags" section and click the gear icon to open the tag settings page.
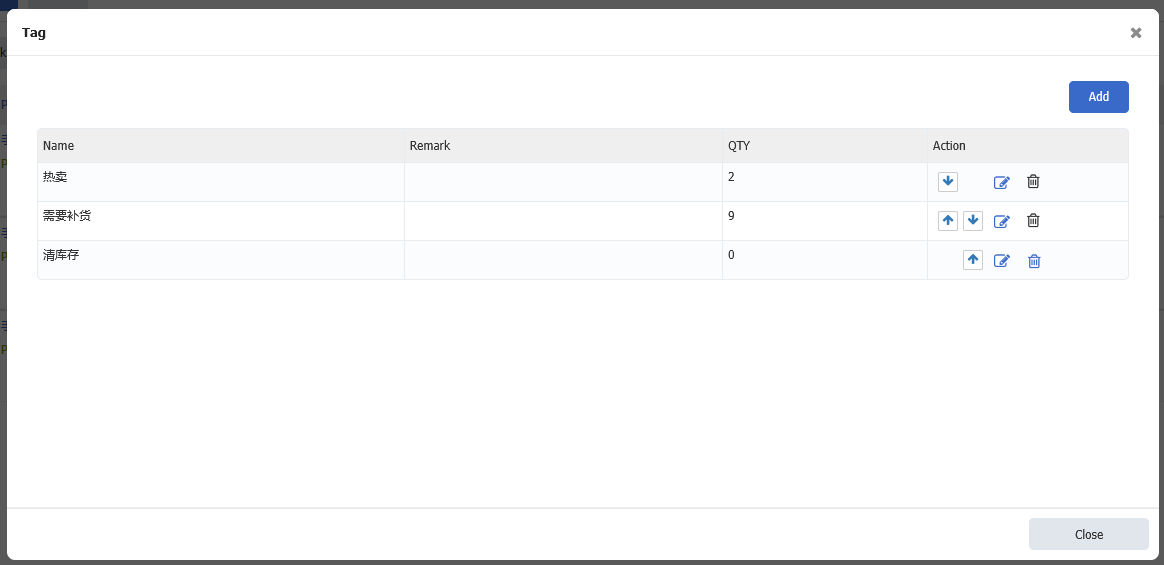
- On the tag settings page, you can add, delete, reorder, or rename tags.
Note: If a tag is currently applied to any profile or listing, it cannot be deleted. You must first remove the tag from all items before deleting. - Once you're done, simply close the window.
Step 2: Apply tags in bulk
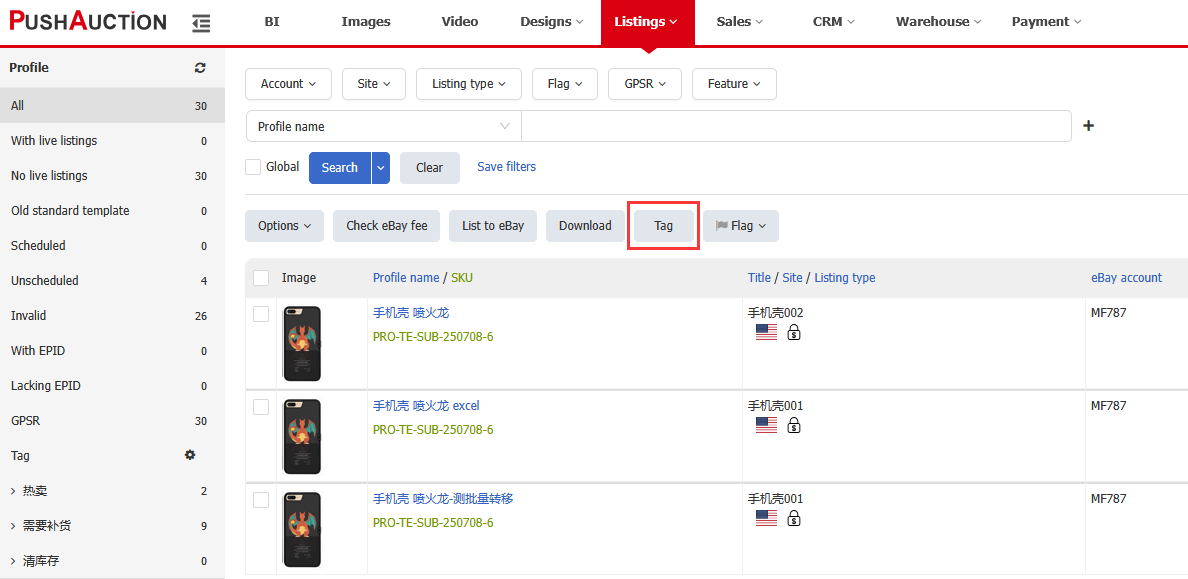
- Select one or more profiles.
- Click the "Tag" button on the toolbar.
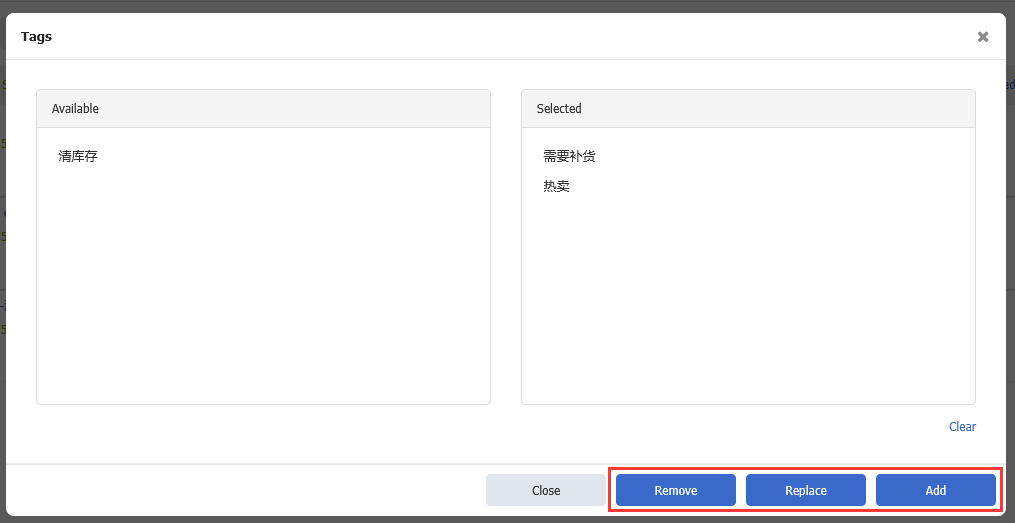
- Choose tags to apply and select one of the following actions:
Add: Add new tags to selected profiles without removing existing ones.
Replace: Remove all existing tags and apply new ones.
Remove: Remove selected tags from the profiles.
Step 3: Filter profiles by tag
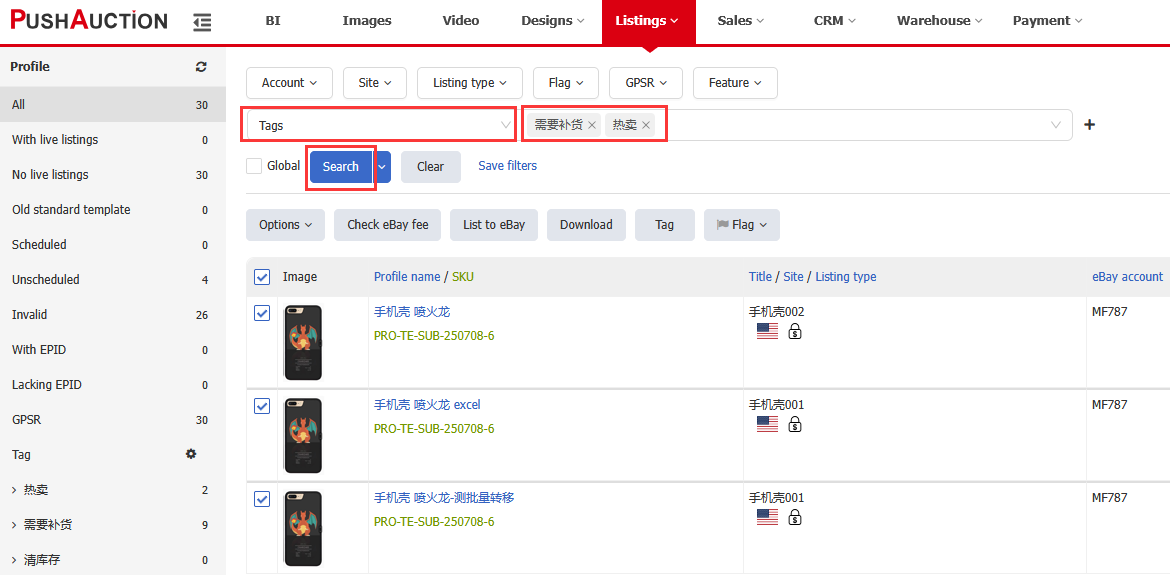
- Navigate to the profile page, in the filter, choose "Tag" and select one or more tags.
- Click "Search" and the page will only display profiles with the selected tags.
- You can then perform batch edits on the filtered results.
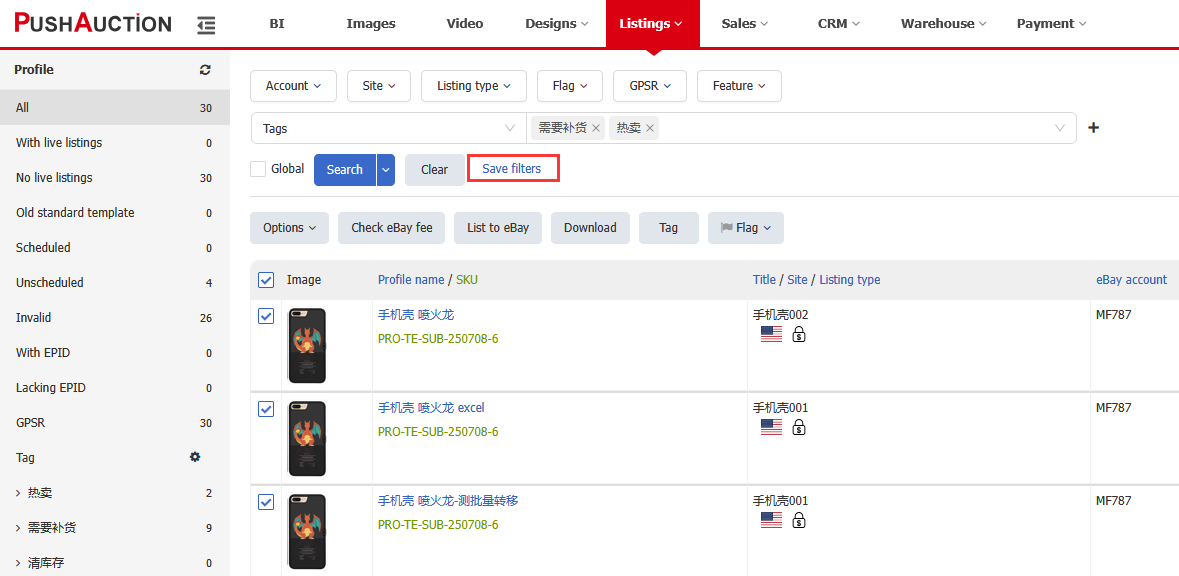
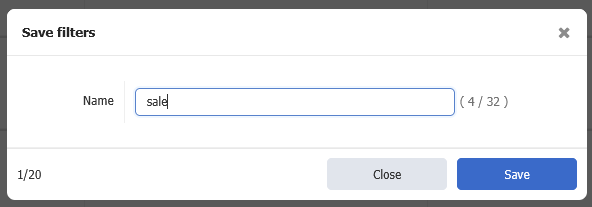
Step 4: Save as a reusable filter (Recommended)
If you frequently use the same tag filters, we recommend saving them for quick access.
This article is also available in the following languages:

 Chinese Simplified
 Chinese Traditional